Your cart is currently empty.
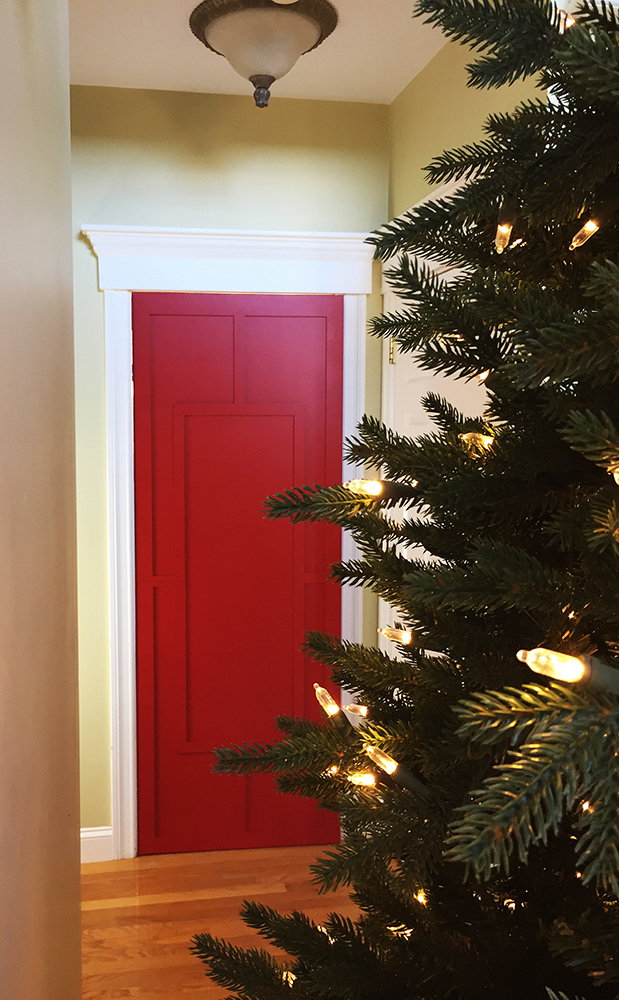
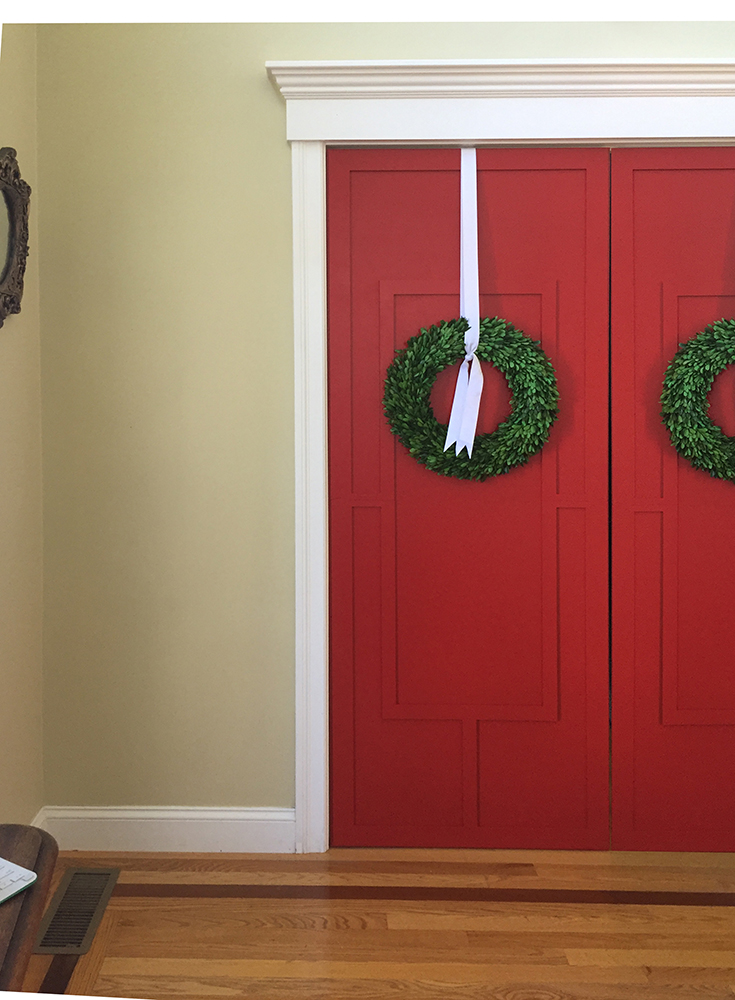
Decorate interior doors with O’verlays for the Holidays
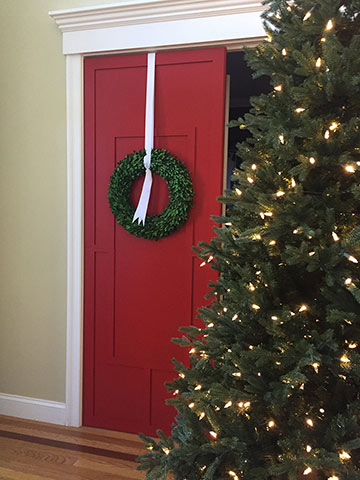
Using O’verlays on interior doors is a smart way to make a spectacular decor statement, and it’s easy to accomplish! This DIY home decor project can be done in very little time aside from the paint’s dry time.
Step by step instructions:
1. These panels are designed for flat surface doors. Doors with framed areas where O’verlays can be set into will need a smaller O’verlay. Please contact us so we can check our inventory for panels that will work with your door.
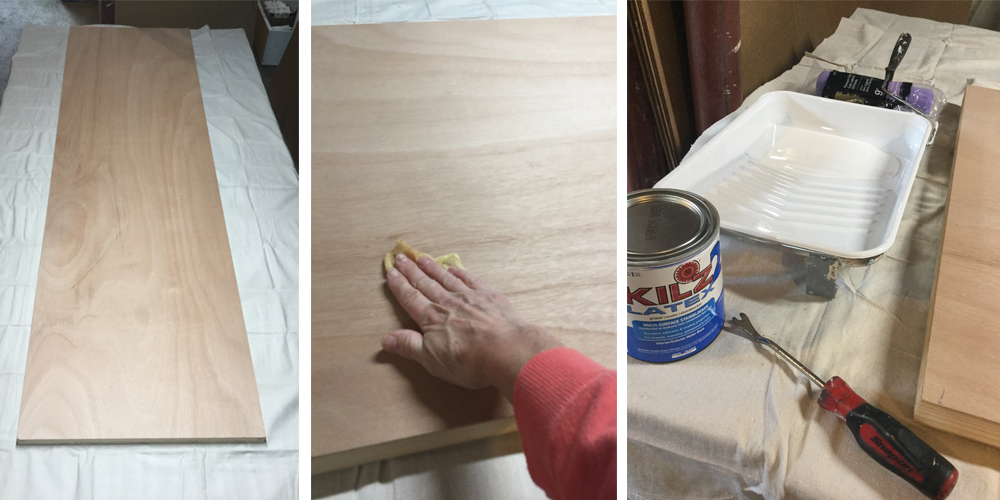
2. Prepare the surface of your door by cleaning to remove any dust and dirt from the surface.
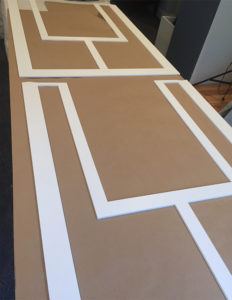
4. Line the panels up on the door and be sure to keep the reveal consistent all around the combined panels.
If needed, the O’verlay can be trimmed to make room for a door knob. Trace around the door knob on the O’verlay and carefully trim with a sharp blade. The knob should fit into the trimmed space or the knob can sit on top of the O’verlay panel if it fits. Touch up the trimmed edges by sanding smooth.
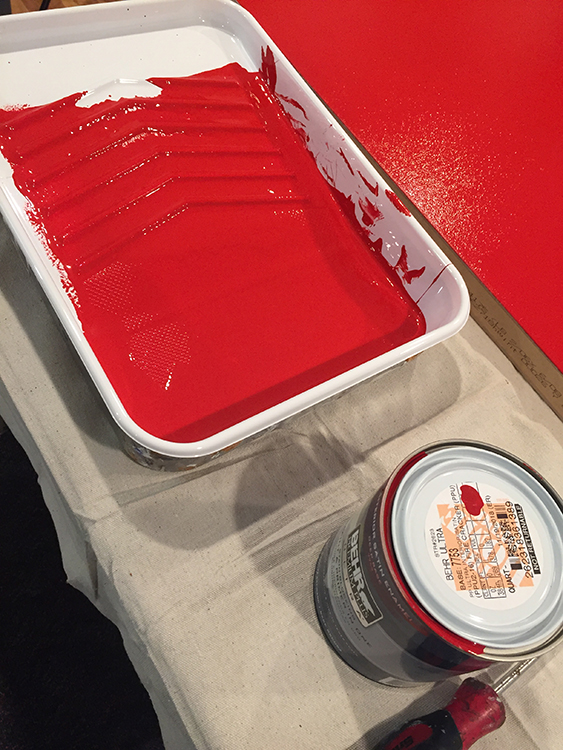
5. Prep your O’verlays according to our Installation Instructions, and paint them using the door paint or a contrasting color. (No need to use primer on your O’verlays)
Apply a few coats of paint if you’re using a paint roller. One good coat is all you should need if you’re using spray paint. Is the door in a high traffic area? You may want to add a coat of matte clear finish to protect the paint from chipping. Let dry completely.

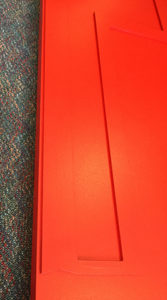
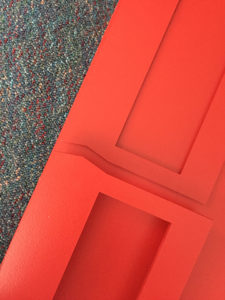

6. Lay the panel on the door, and keep an even reveal (approximately 1/4″) all around the outside edges of the panels. Piece the two panels together and create a tight seam.
7. Attach the panels to the doors using a strong adhesive such as Liquid Nails Silicone Adhesive or an epoxy.
Use painters tape to hold the o’verlays in place when you’re applying panels to a door that is already hung. There will be a seam in the middle of the panel. Leave the seam as is (like we did), or seal it with a spackling paste made for vinyl. Touched up with paint. Re-attach door knobs or handles.
Our inspiration:
In the Crate & Barrel 2018 Christmas Catalog, the display room featured beautiful red doors that we thought would look great with O’verlays.
Happy Holidays!

XO,
The O’verlays Team