Your cart is currently empty.
How to Paint Your O’verlays
How to Paint O’verlays
|
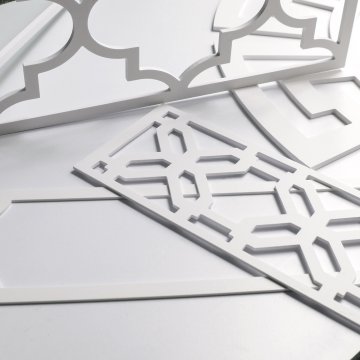
| Unpainted O’verlays |
 |
| Painted O’verlays |
Spray Paint (easiest):
You’ll need…
- Spray paint color of your choice such as Rustoleum or a similar product. In this demonstration we used Rustoleum spray paint in Coral
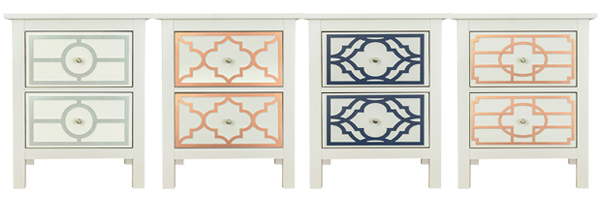
- Your choice of O’verlays we used the 7″ x 14″ Grace
- Isopropyl alcohol such as household rubbing alcohol
- Clean cloth or paper towel
- Emery board or fine sand paper
Step 1:
Prep the O’verlay by using the emery board to lightly sand any rough edges until smooth. To get rid of any dust use the clean cloth or paper towel and isopropyl alcohol such as rubbing alcohol to wipe down the O’verlay removing any residue before painting.


Step 2:
Place the O’verlay on a flat and clean surface. Paint the O’verlay following the manufacturer’s instructions and drying times. If done correctly, the O’verlay should only need one coat of spray paint. Allow to dry completely. Don’t forget to paint the edges of the O’verlays. It’s not necessary to use primer when painting.


Step 3:
*Only applies to O’verlays being used for windows, glass, and mirrors*
We suggest painting both sides of the O’verlay if it is being used for windows, glass, or mirrors since the reverse side will most likely be visible. Repeat step 2 allowing the paint to dry completely before attaching the O’verlay to a surface.

**Something else to note: For some reason unknown to us, using “craft spray paint” from Krylon or Rustoleum does not work as well as regular spray paint. This type of paint is usually sold in craft stores such as Michael’s.**
Interior Acrylic/Latex paints, Velvet paint, Milk paint, Chalk paint
You’ll need…
- Paint color of your choice we used Glamorous by Velvet Finishes **IMPORTANT: MAKE SURE THE PAINT YOU USE IS NOT OIL BASED**
- A small or large roller brush (small tends to work the best)
- Small paint brush
- Paint tray
- Your choice of O’verlays we used the 7″ x 14″ Grace
- Isopropyl alcohol such as household rubbing Alcohol
- Clean cloth or paper towel
- Emery board or fine sand paper
Step 1:
Prep the O’verlay by using the emery board to lightly sand any rough edges until smooth.

To get rid of any dust use the clean cloth or paper towel and isopropyl alcohol such as rubbing alcohol to wipe down the O’verlay removing any residue before painting.


**IMPORTANT TO KNOW: If using primer (optional), be sure it has cured/dried according to the manufacturer’s instructions otherwise the next coat of paint will bubble on the O’verlay.**
Step 2:
Place the O’verlay on a flat and clean surface to avoid dripping marks and in a moderate to cool environment. Prepare your paint according to the manufacturer’s instructions.
** Avoid painting in extreme heat or direct sun for this may cause the panels to warp.**

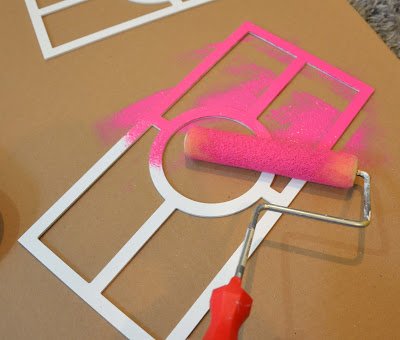
Using the roller brush, paint an even coat of color on the surface of the O’verlay as well as the edges.

Using the smaller paint brush, paint any edges that could not be reached by the roller brush. Let dry.
Step 3:
Most likely, the O’verlay will need one or two more coats of paint. Repeat Step 2 until desired color is attained.


Step 4:
*Only applies to O’verlays being used for windows, glass, and mirrors*
We suggest painting both sides of the O’verlay if it is being used for windows, glass, or mirrors since the reverse side will most likely be visible. Repeat steps 2 and 3 then allow the paint to dry completely before attaching the O’verlay to a surface.

**OPTIONAL – But good to know**
After the paint has dried, a light spray of Matt Clear finish is great for added protection from scratches if the panels are being used in a high traffic area.
Contact us at contact@myoverlays.com if you have any questions or helpful suggestions.
OX
The O’verlays Team

P.S. We love seeing before and after pictures of your projects!
Other Projects: