Your cart is currently empty.
The Original PAX Wardobe “How To”
This company started because of an IKEA hack and some fretwork panels found at a flea market.
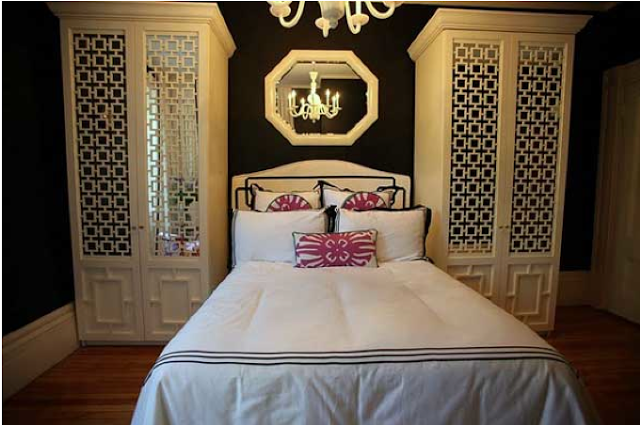
I had a client that owned two maple PAX wardrobes that became the perfect vehicle for fretwork. With the help of a carpenter this high end look was created…

from these…

…actually these exact ones (with a stripe painted on them)…
BEFORE


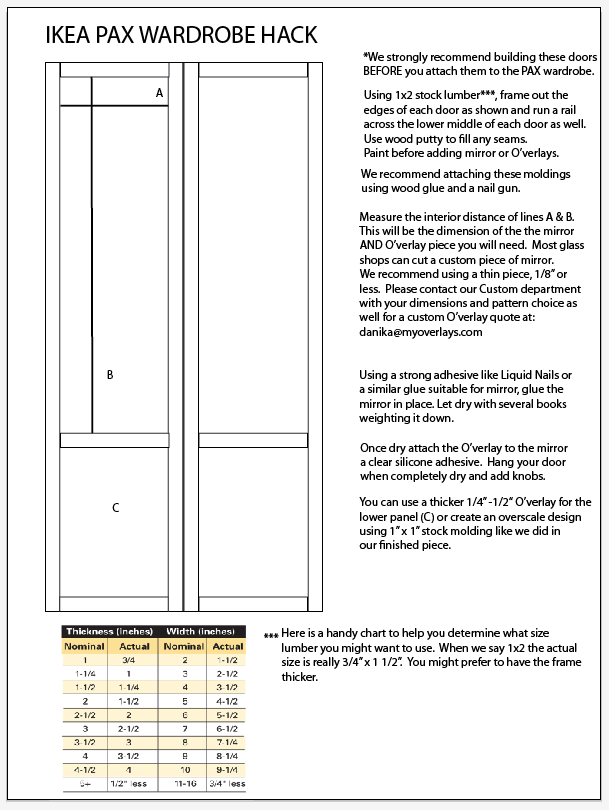
I wish I could say all you need is some basic 1×2 flat stock lumber, a couple yards of crown molding, custom cut mirrors topped with fretwork and viola! But in reality you need to measure twice, cut once… a boatload of patience and a friend with carpentry skills helps.
We made an outline of how to do this. It is basic, allowing you to control the opening size for your mirror depending on what size lumber you choose.
You will need some big tools like a chop saw, and a nail gun is helpful too, but stores like Home Depot and Lowes can cut your lumber to size.
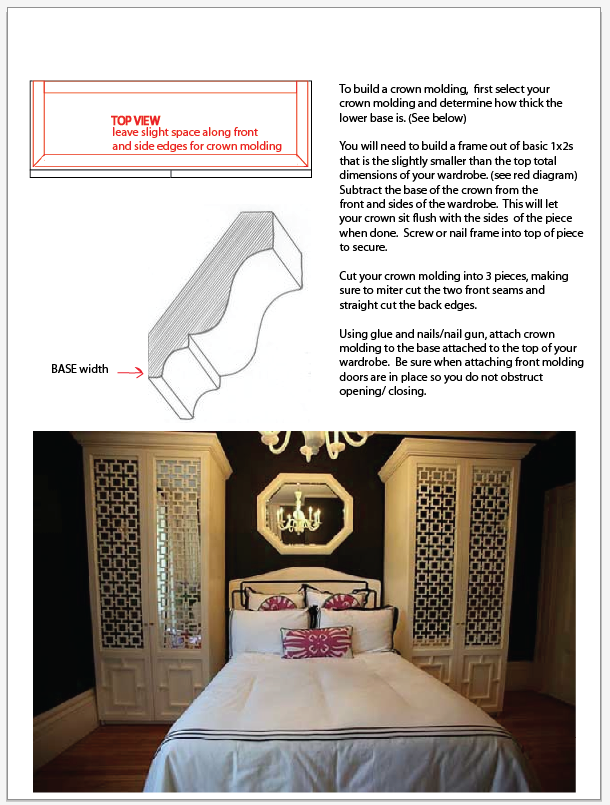
(Here they are before the crown molding was added, if you want to save a bit you can opt to leave them off.)

So with out further ado, here is the how to:
Some extra money saving ideas:
-Use the 76″ tall PAX as opposed to the 90″
-Try to find a precut mirror at a home improvement store. They start at $9.99, like the IKEA MINDE mirror which is 15.75″ x47.25″.
-Use lightweight foam crown molding. It is easy to cut and can be held up with a strong glue.
Best of all, once painted it looks just like wood.